
-
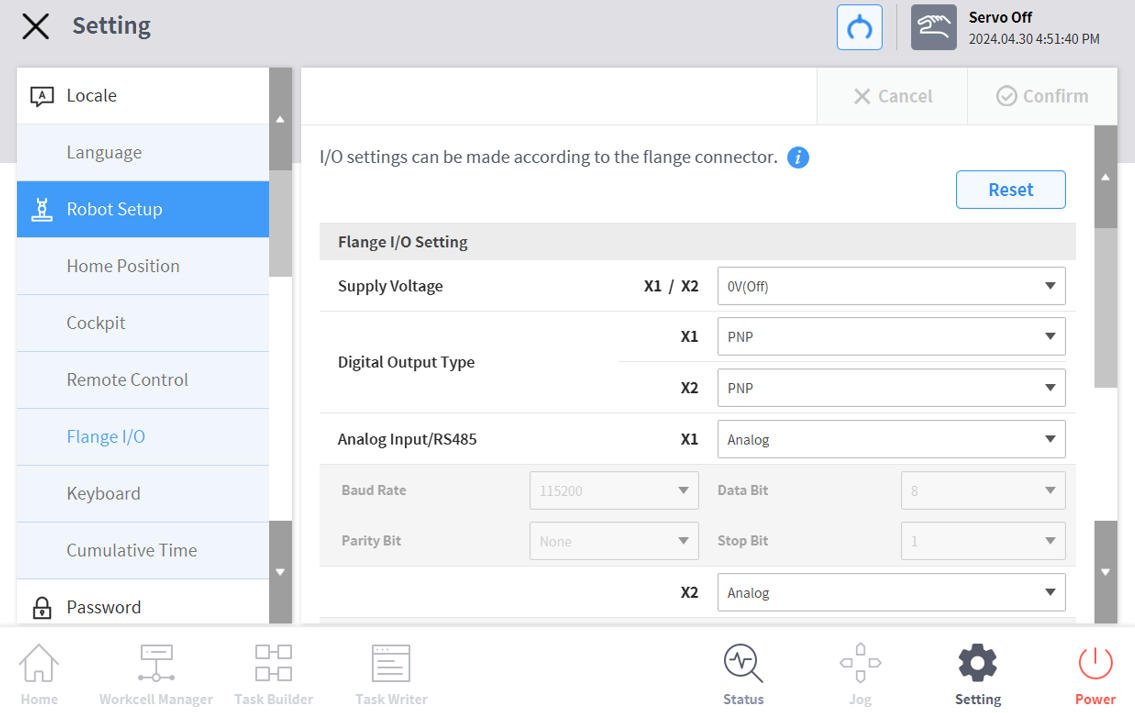
In the Settings menu area, select the Flange I/O menu in Robot Settings (only visible when a new flange is connected)
-
The currently set information appears in the Settings Management window.
-
-
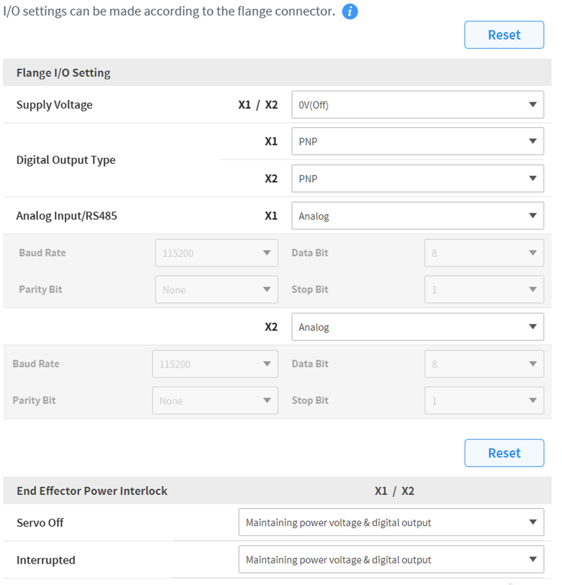
Change options in flange I/O settings (X1/X2)
-
Supply Voltage
-
0V/12V/24V(default) power supply function
-
-
Digital output type
-
PNP / NPN
-
-
Analog Input/RS485
-
Use X1/X2 ports as analog input or RS485
-
When selecting RS485, please set Baud Rate, Data Bit, Parity Bit, and Stop Bit.
-
-
-
Change options for End Effector Power Interlock
-
Servo Off
-
Maintaining power voltage & digital output
-
Switch the power voltage & digital output to 0V and revert to the last state when Servo On.
-
-
Interrupted
-
Maintaining power voltage & digital output
-
Switch the power voltage & digital output to 0V and revert to the last state when reset.
-
-
-
When finished, press the OK button.
-
Your environment setup to use flange I/O is now complete.
-
Note
A series only displays X1.