Stop Distance and Stop Time of Joint 1 (Base)
|
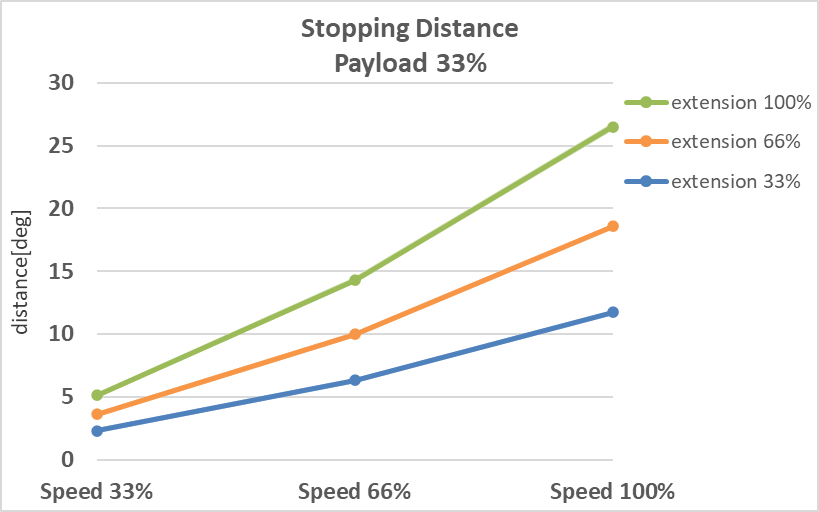
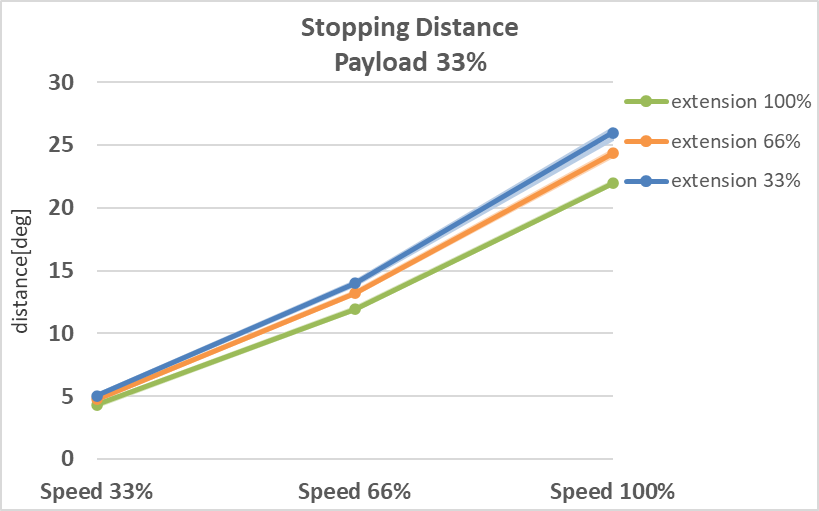
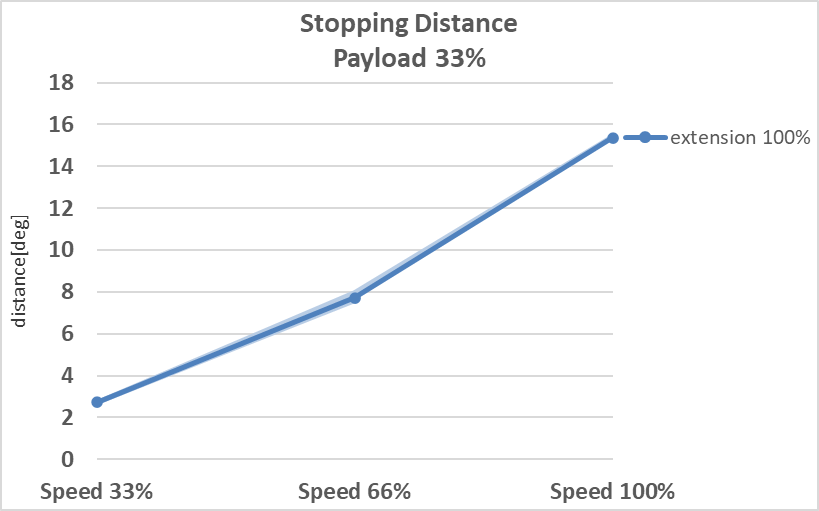
Stop Distance at 33% of Max. Load (deg) |
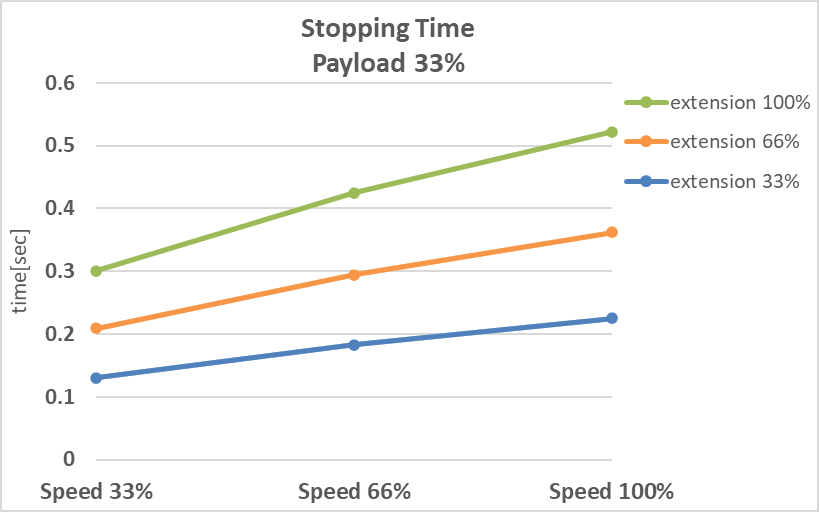
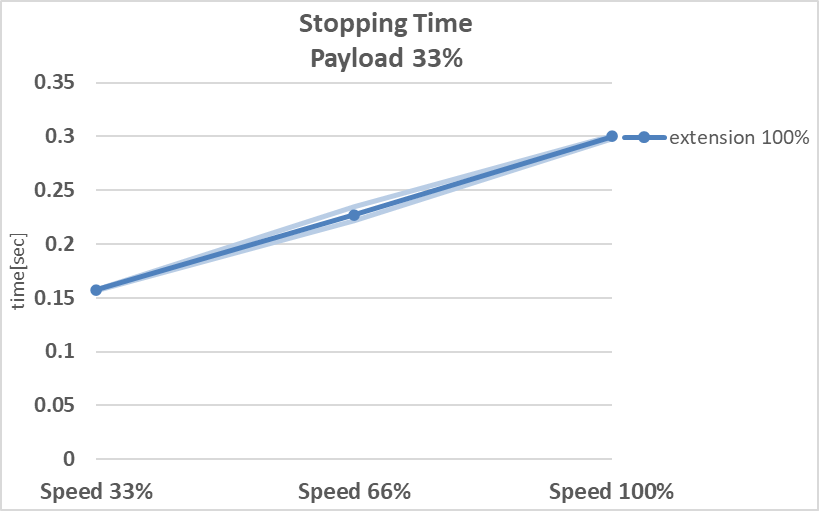
Stop Time at 33% of Max. Load (s) |
|
|
|
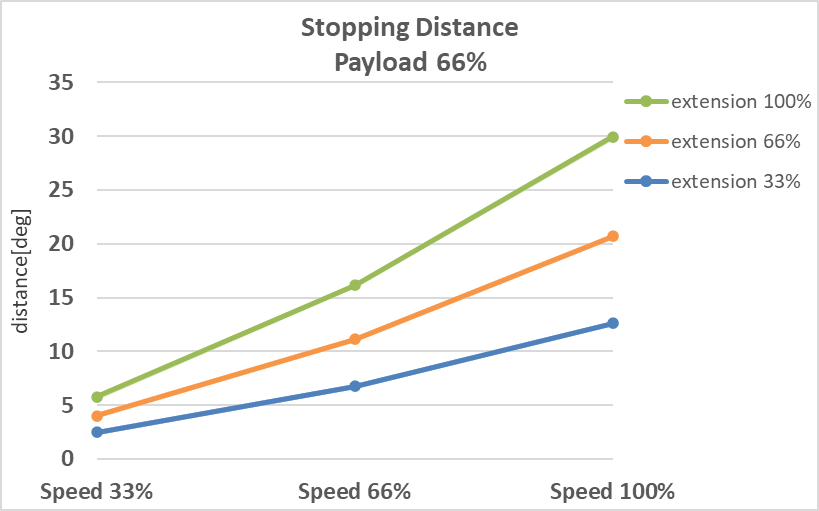
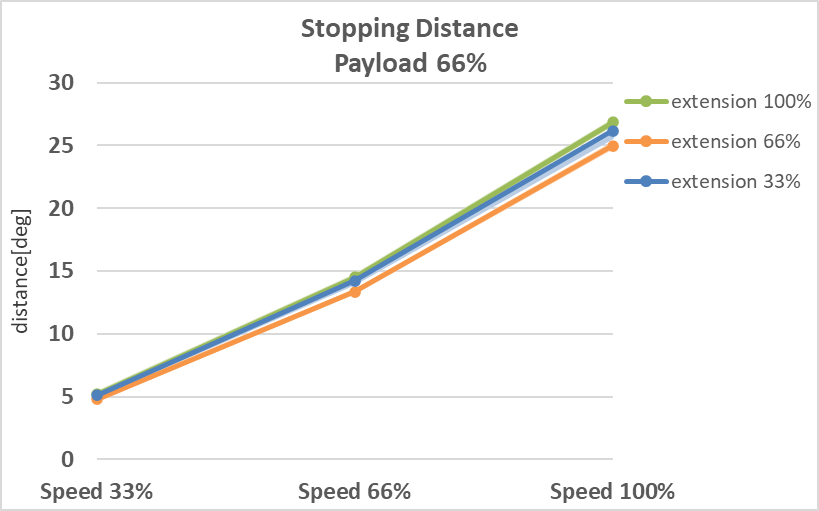
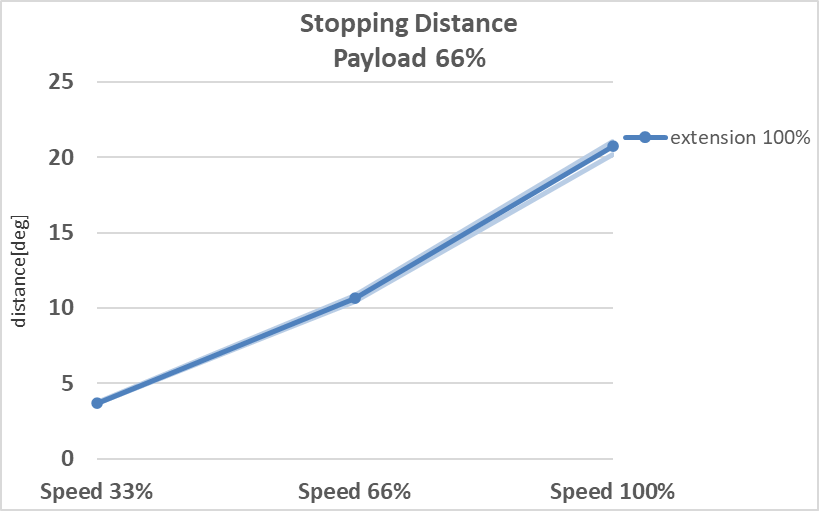
Stop Distance at 66% of Max. Load (deg) |
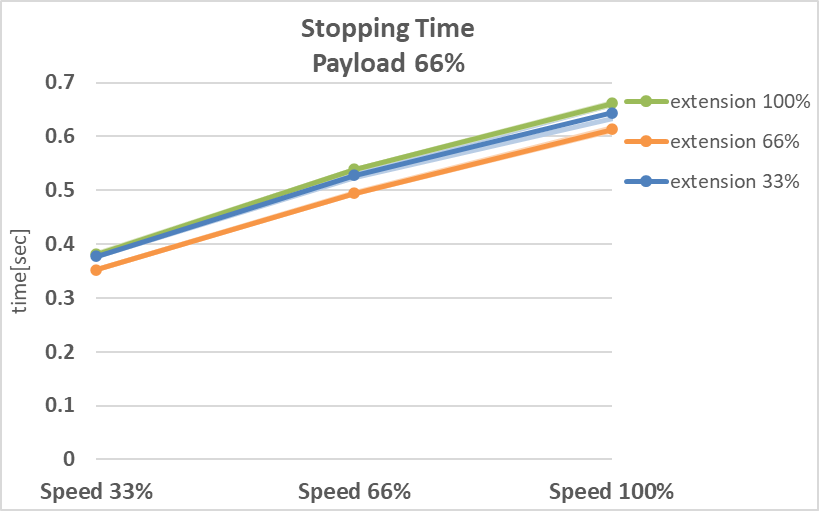
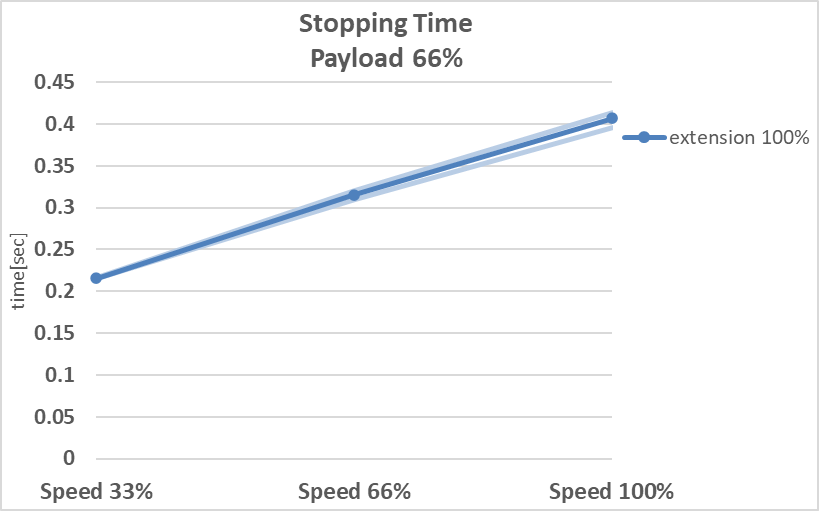
Stop Time at 66% of Max. Load (s) |
|

|
|
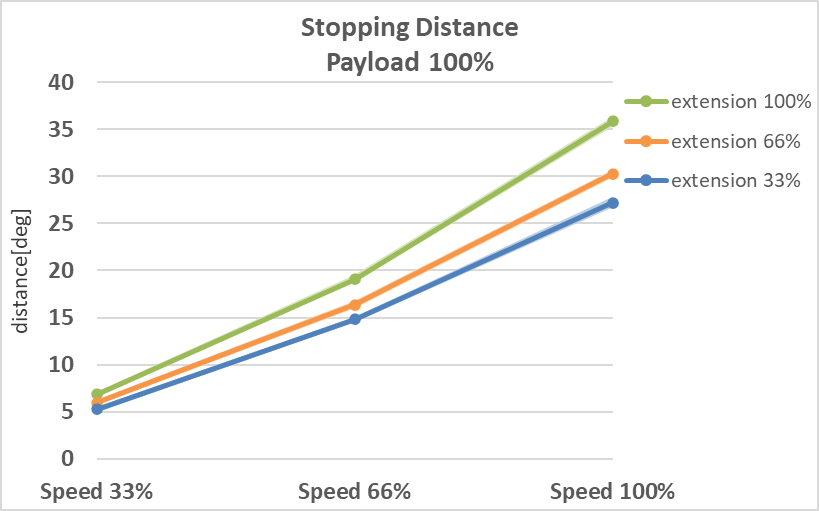
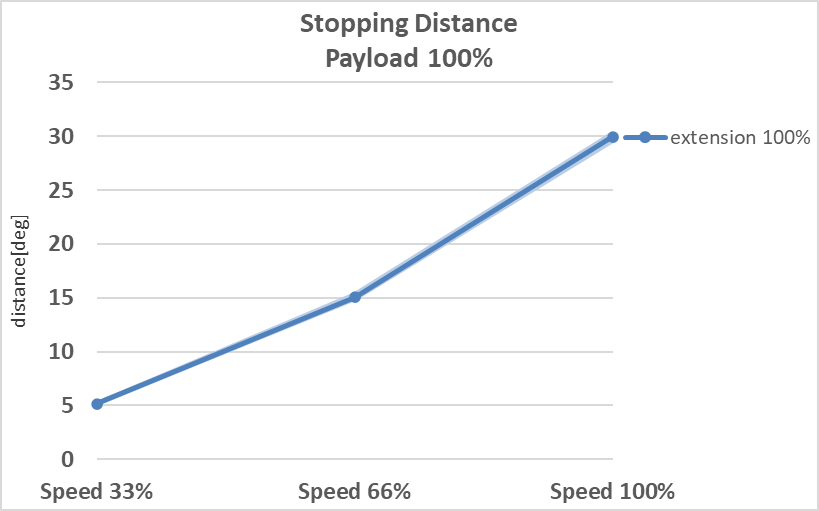
Stop Distance at Max. Load (deg) |
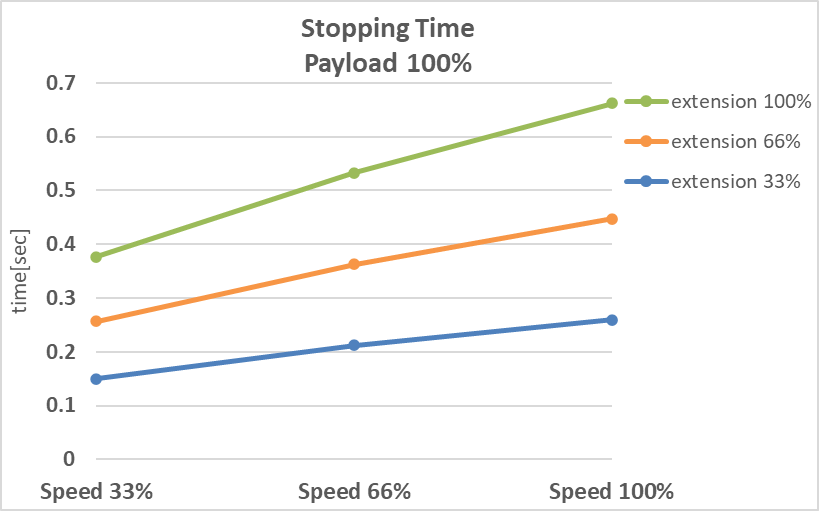
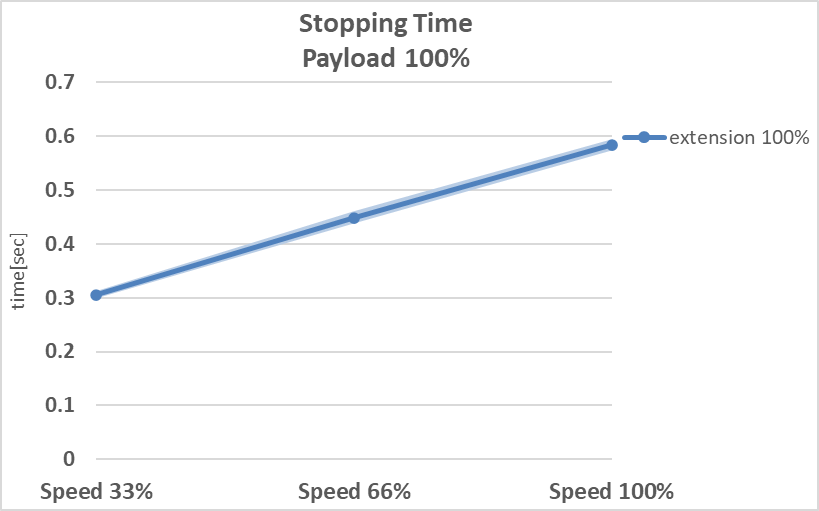
Stop Time at Max. Load (s) |

|
|
Stop Distance and Stop Time of Joint 2 (Shoulder)
|
Stop Distance at 33% of Max. Load (deg) |
Stop Time at 33% of Max. Load (s) |
|

|
|
Stop Distance at 66% of Max. Load (deg) |
Stop Time at 66% of Max. Load (s) |
|
|
|
Stop Distance at Max. Load (deg) |
Stop Time at Max. Load (s) |
|

|
Stop Distance and Stop Time of Joint 3 (Elbow)
|
Stop Distance at 33% of Max. Load (deg) |
Stop Time at 33% of Max. Load (s) |
|
|
|
Stop Distance at 66% of Max. Load (deg) |
Stop Time at 66% of Max. Load (s) |
|
|
|
Stop Distance at Max. Load (deg) |
Stop Time at Max. Load (s) |
|
|