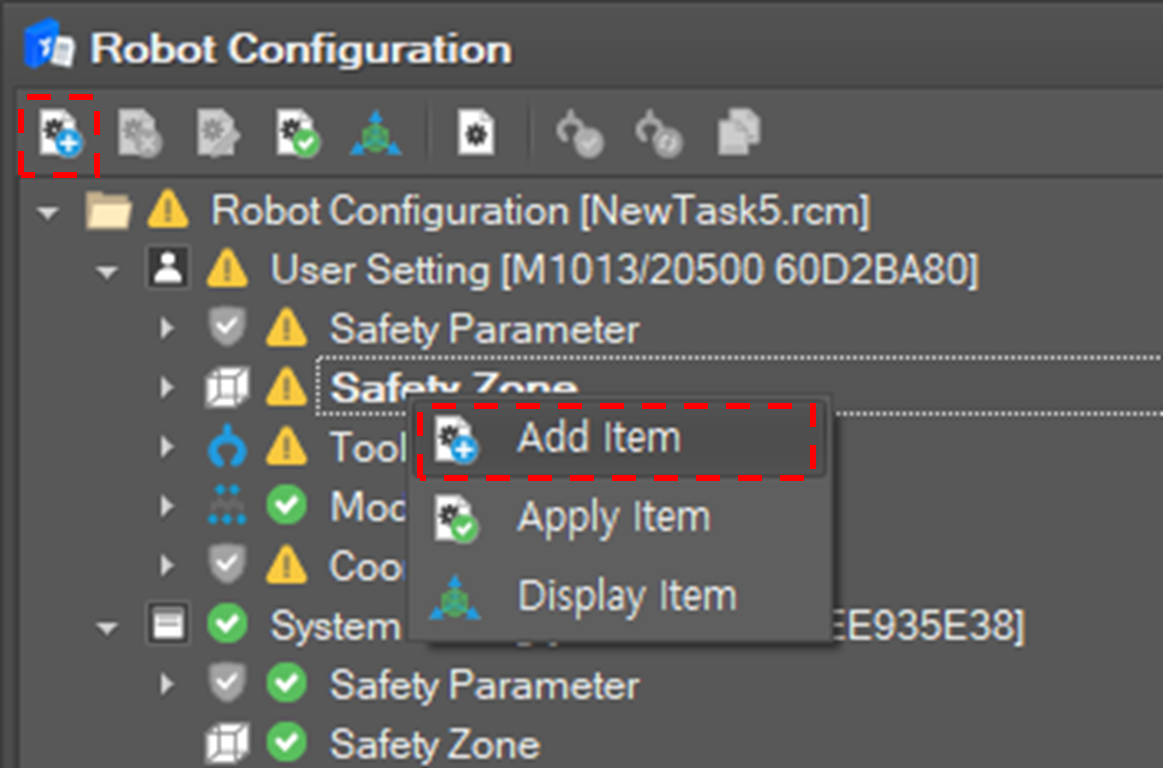
Add a safety zone
To add a safety zone click Add Item 
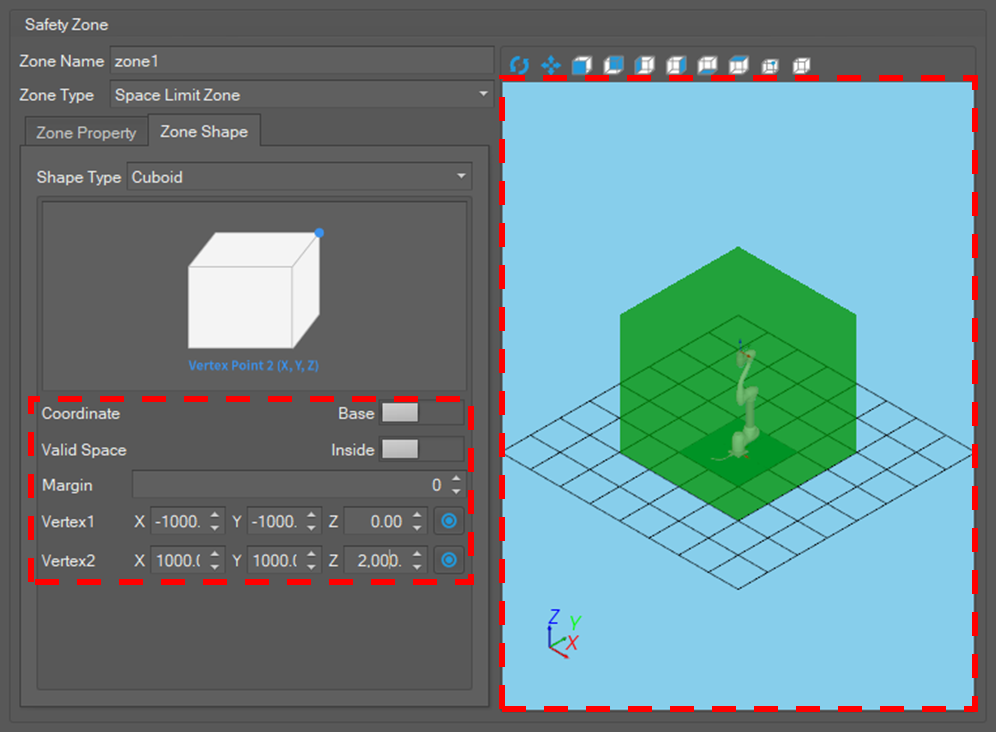
Define properties of the safety zone
Set the name of the zone. It should be unique.

Select the type of the zone and set the properties.

Define the shape of the safety zone.
Select the Zone Shape tab, and select the shape type.

Set properties of the shape. If the shape is properly set, the shape is displayed in the shape view.
The user can manipulate the 3d shape view by using the functions below.

-
Move: Click the Move

-
Rotate: Click the Rotate

-
View Direction: To change the viewpoint, click one of the View Direction If you click the To –X button, the scene rotates so that the forwarding direction directs to the –X direction.
-
Show Safety Zone: Select the zone type to show on the screen in the Context menu that appears when the Show Safety Zone button is clicked.
-
Select: Click the Select

-
Zoom: Scroll the mouse wheel upward to zoom in. Scroll the mouse wheel downward to zoom out.
-
Scene Fitting: Press the F5 key.
Confirm the safety zone
If editing is done, click the Confirm button. Or the user can discard the setting by clicking the Close button.

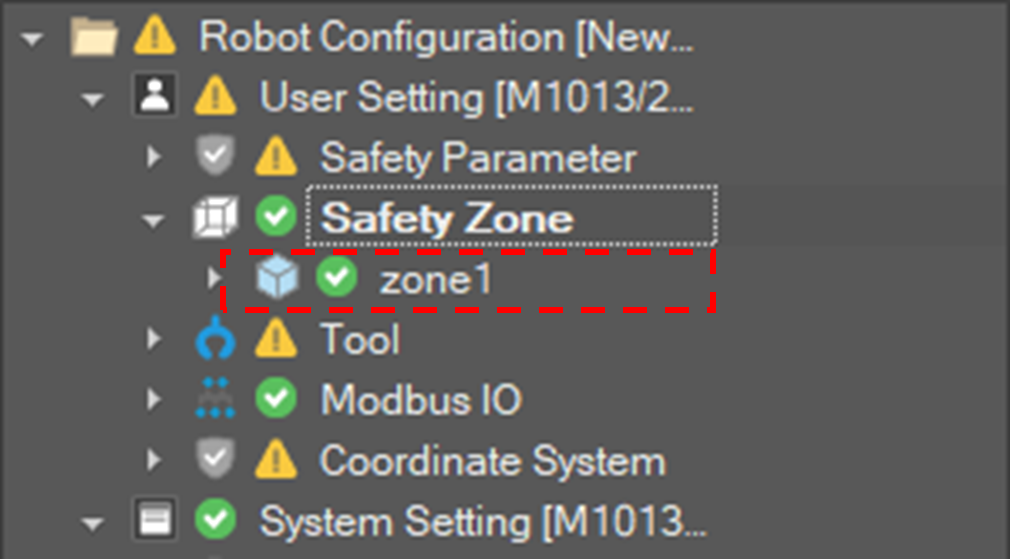
If the user confirm the setting, a new safety zone item is added to the configuration tree.
If the DART Studio is connected to the controller, the setting is applied to the system. Or if it is not connected to the controller, the setting is just saved to the configuration file.
Modify a safety zone
To modify setting of a safety zone click Modify Item 
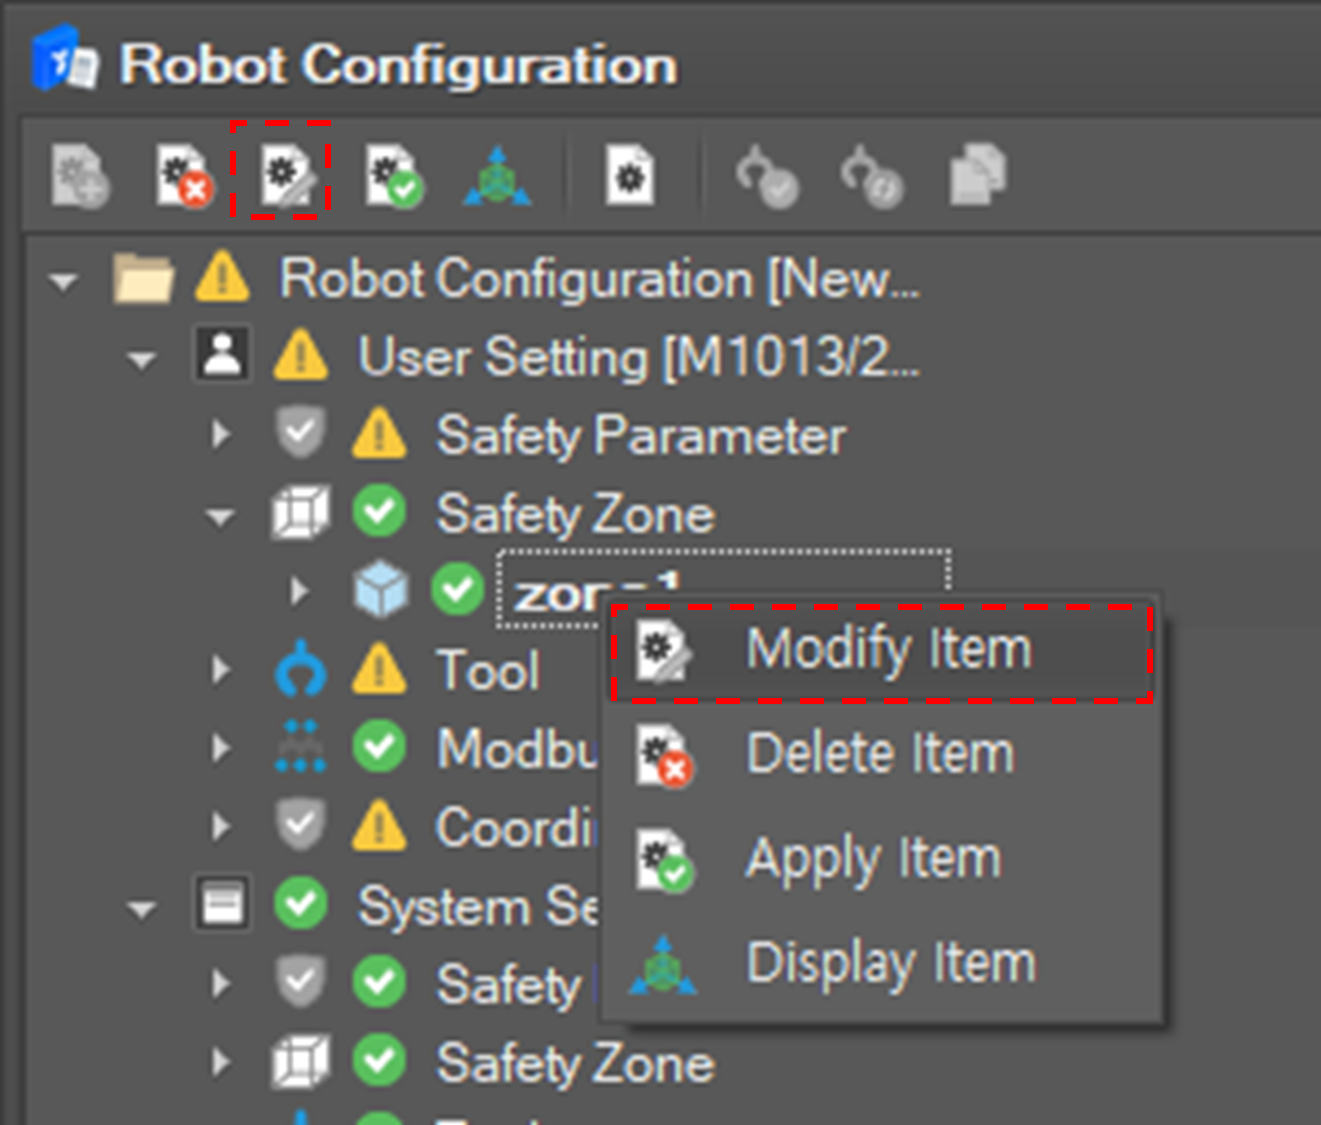
If the button is clicked, the editing window is displayed. After editing the setting click the Confirm button to confirm the setting.
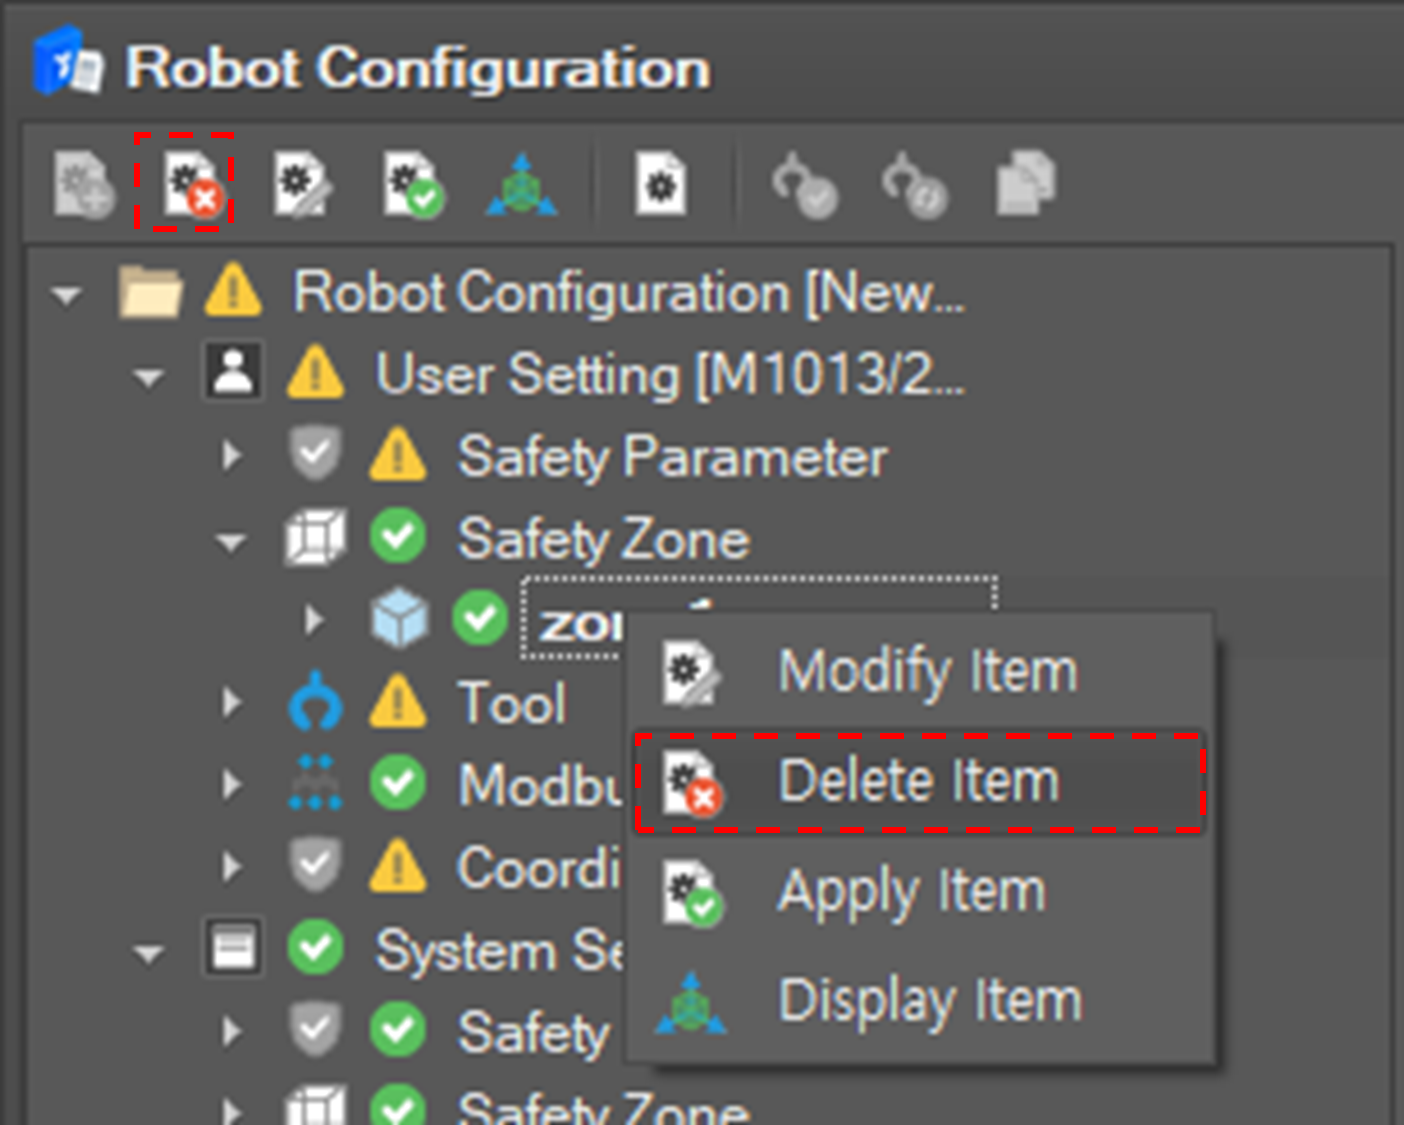
Delete a safety zone
To delete a safety zone click Remove Item button on the toolbar or select the Remove Item 
Display a safety zone
To display a safety zone click Display Item 
Then the safety zone is display in the Motion Monitoring view.
