
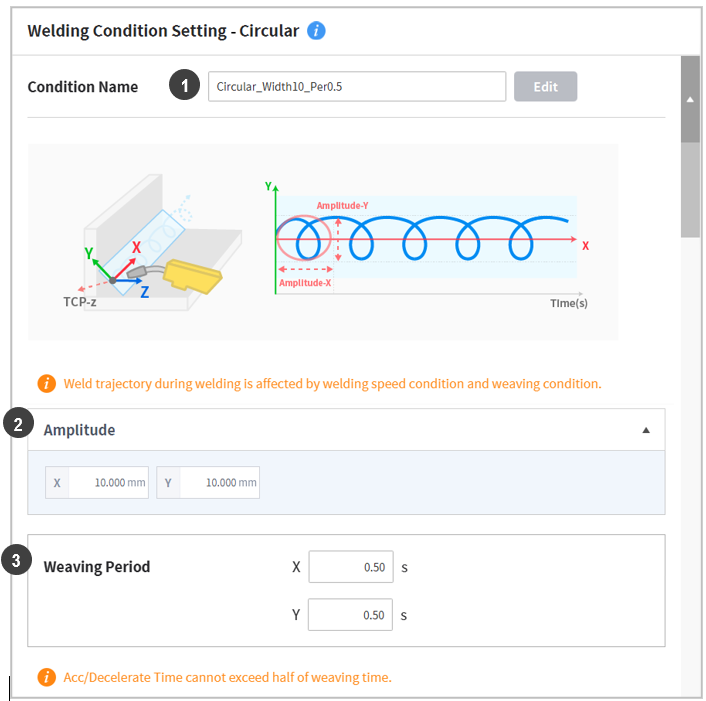
A circular weaving trajectory can be created by setting four values: the amplitudes and periods of both the weaving x and weaving y directions. The welding trajectory shown in the figure below is the result of overlapping the weaving motion and the taught linear trajectory. When a circular weaving pattern is applied, the weaving motion repeats according to the amplitude and period of the two directions. Therefore, the weaving period (x period, y period) per welding distance can vary depending on the target welding speed. For example, if the welding speed is 60 cm/min (=10 mm/sec) and the weaving period is 1 second (x period = y period = 1 s), 1 weaving period is made per 10 mm, but if the welding speed is 30 cm/min (5 mm/sec),2 weaving periods are made per 10 mm in the same weaving condition.
The values entered in the Weaving Condition Settings screen are as follows:
|
No. |
Item |
Description |
|---|---|---|
|
1 |
Weaving Condition Name |
Enter the name of the weaving condition. |
|
2 |
Weaving Amplitude (X and Y) |
This is the amplitude of the two directions of a circular weaving pattern. Enter the desired amplitude based on the welding path (unit: mm). For example, to execute circular weaving (diameter = 6 mm) with an amplitude of a 6 mm centered on the welding path, enter X=6 and Y=6. |
|
3 |
Weaving Period (X and Y) |
This is the weaving period (in seconds) of the two directions. For example, to execute circular weaving (diameter = 6 mm) with an amplitude of 6 mm and a period of 1 second centered on the welding path, enter X period=1 and Y period=1. |