The Angle Tool measures the angle between two lines. Place areas A and B on a line you want to measure and press the Calculate button to measure the angle between A and B. Adjust the acceptance range (Tolerance) of the check based on measured angle values to set the angle check.
|
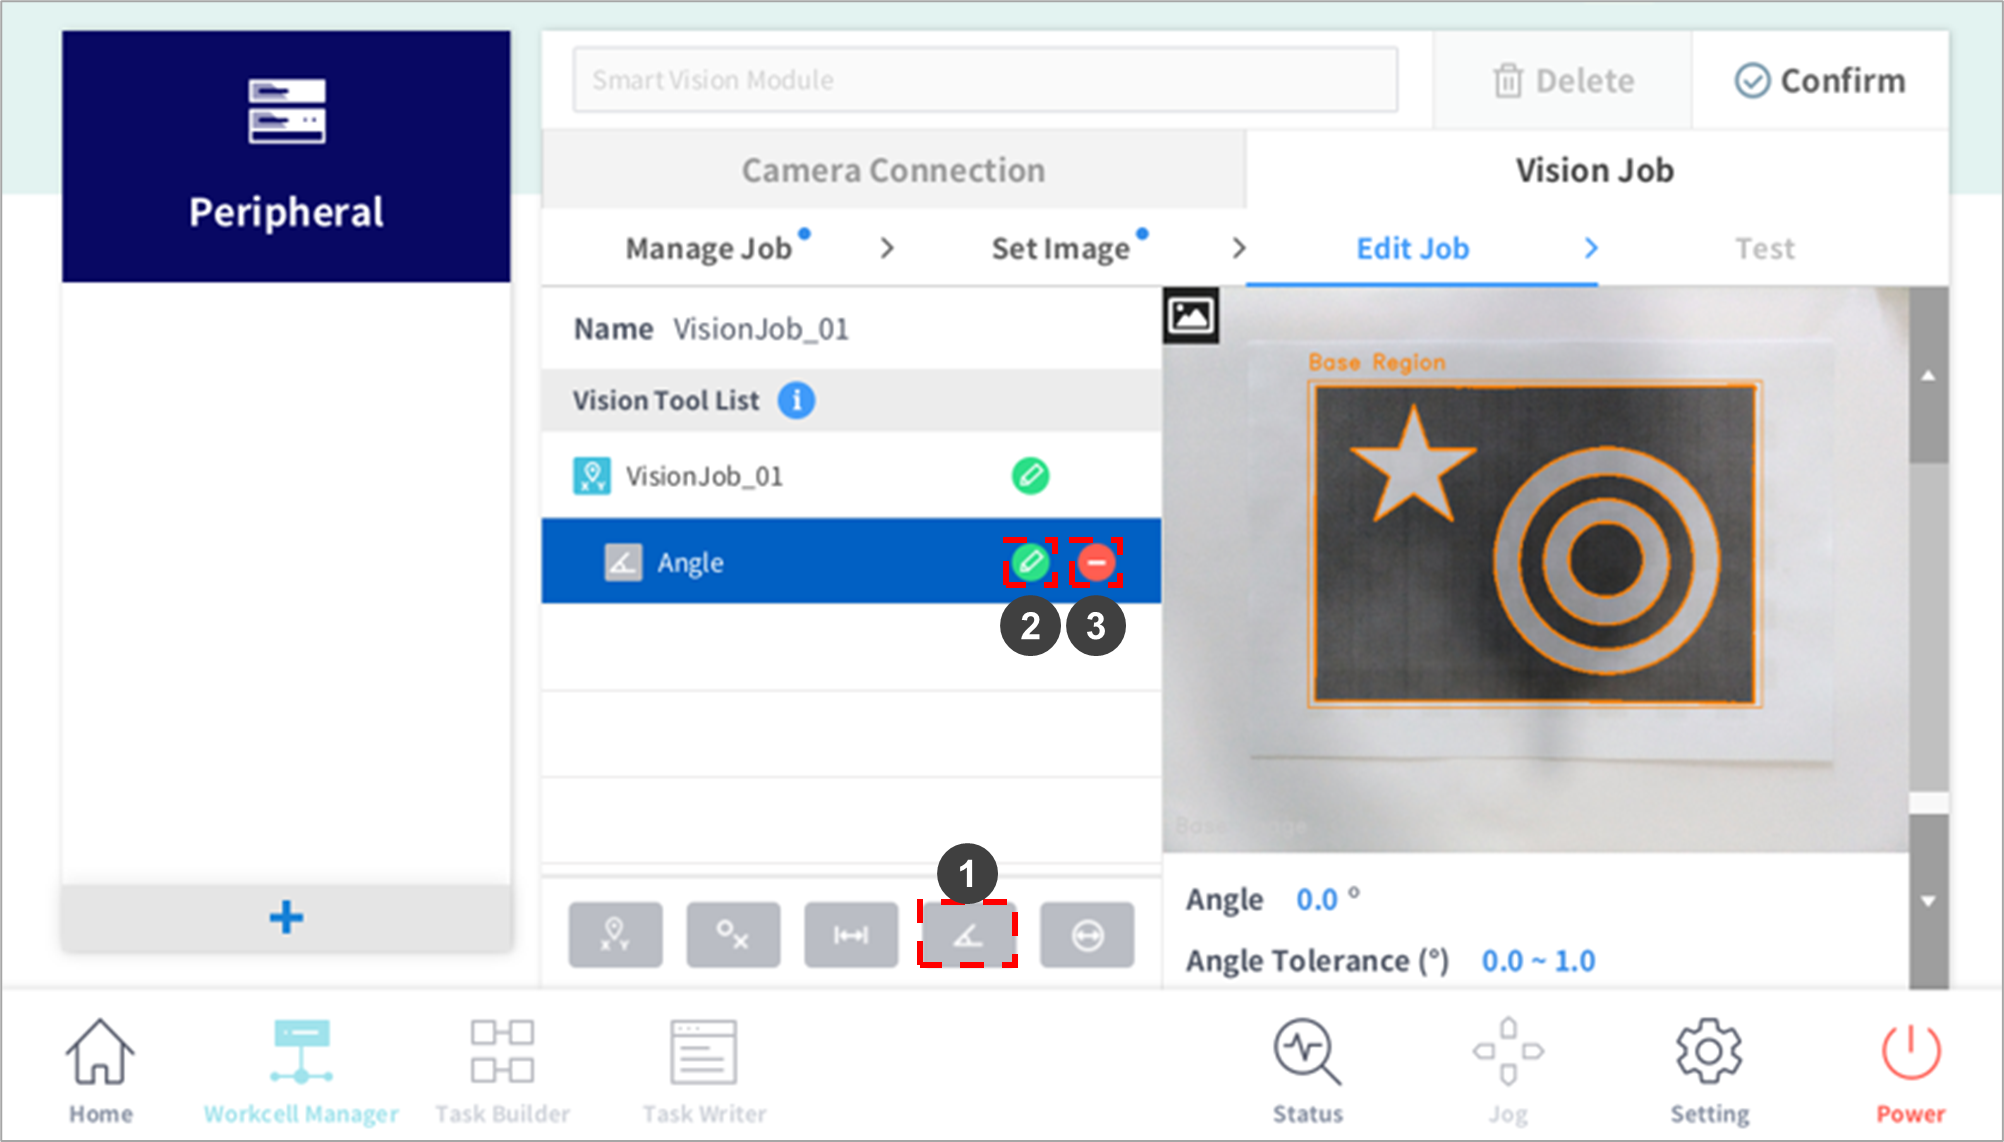
No. |
Item |
Description |
|---|---|---|
|
1 |
Add Angle Tool |
Adds an Angle Tool to the Vision Tool List. |
|
2 |
Edit |
A setting window of the job selected from the Vision Tool List is displayed. |
|
3 |
Delete |
The selected job from the Vision Job List is deleted. |
|
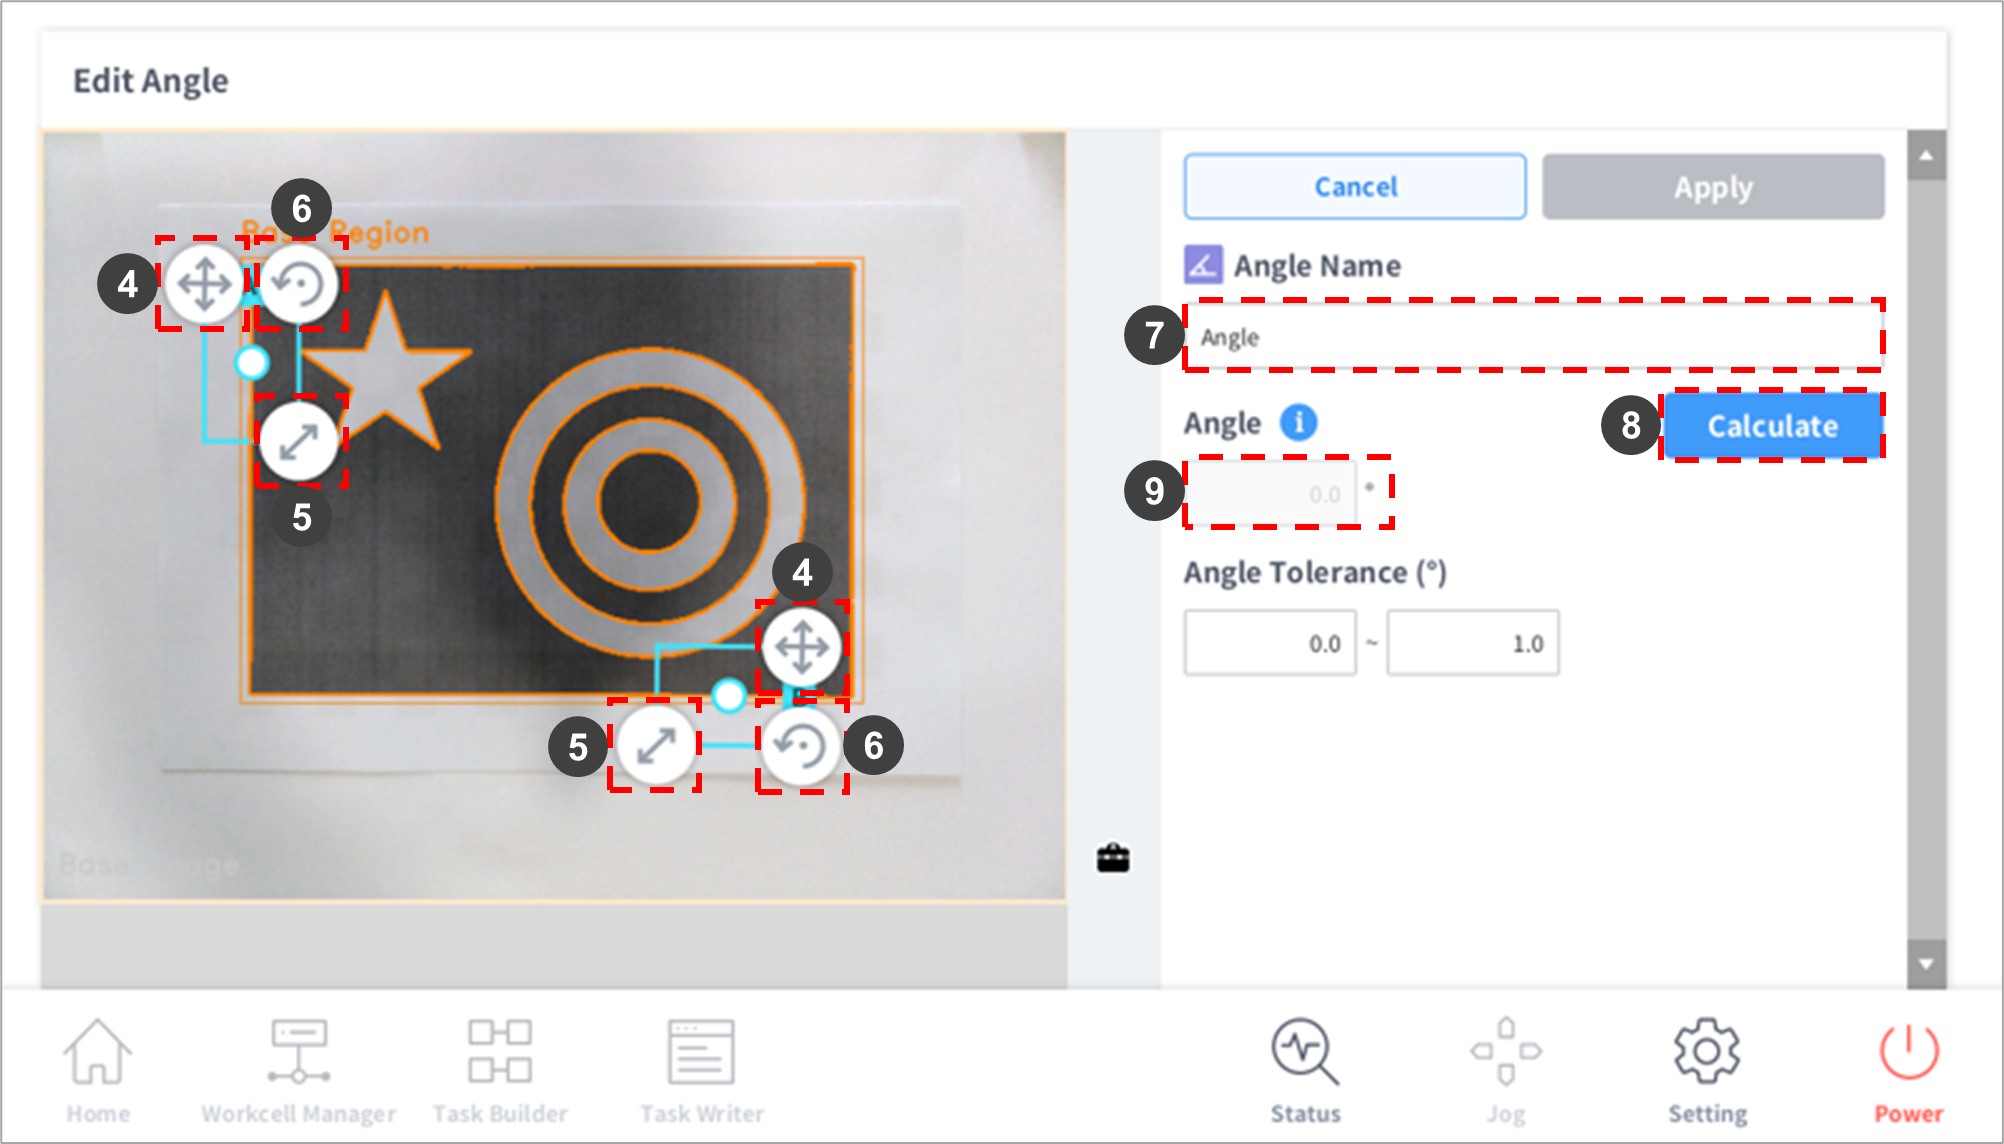
4 |
Move Teaching Area |
Press and hold the arrow to move the teaching area. |
|
5 |
Adjust Teaching Area Size |
Press and hold the arrow to adjust the teaching area size.
|
|
6 |
Adjust Teaching Area Size (circular arrow) |
Press and hold the arrow to rotate the teaching area. |
|
7 |
Edit Job Name – Edit Window |
A virtual keyboard is displayed, and the job name can be edited.
|
|
8 |
Calculate |
Measures the angle at which the extension lines of each line meet when lines exist in the two teaching areas (A, B). |
|
9 |
Angle Display |
Displays the angle between lines detected in two teaching areas in the edit window. |
|
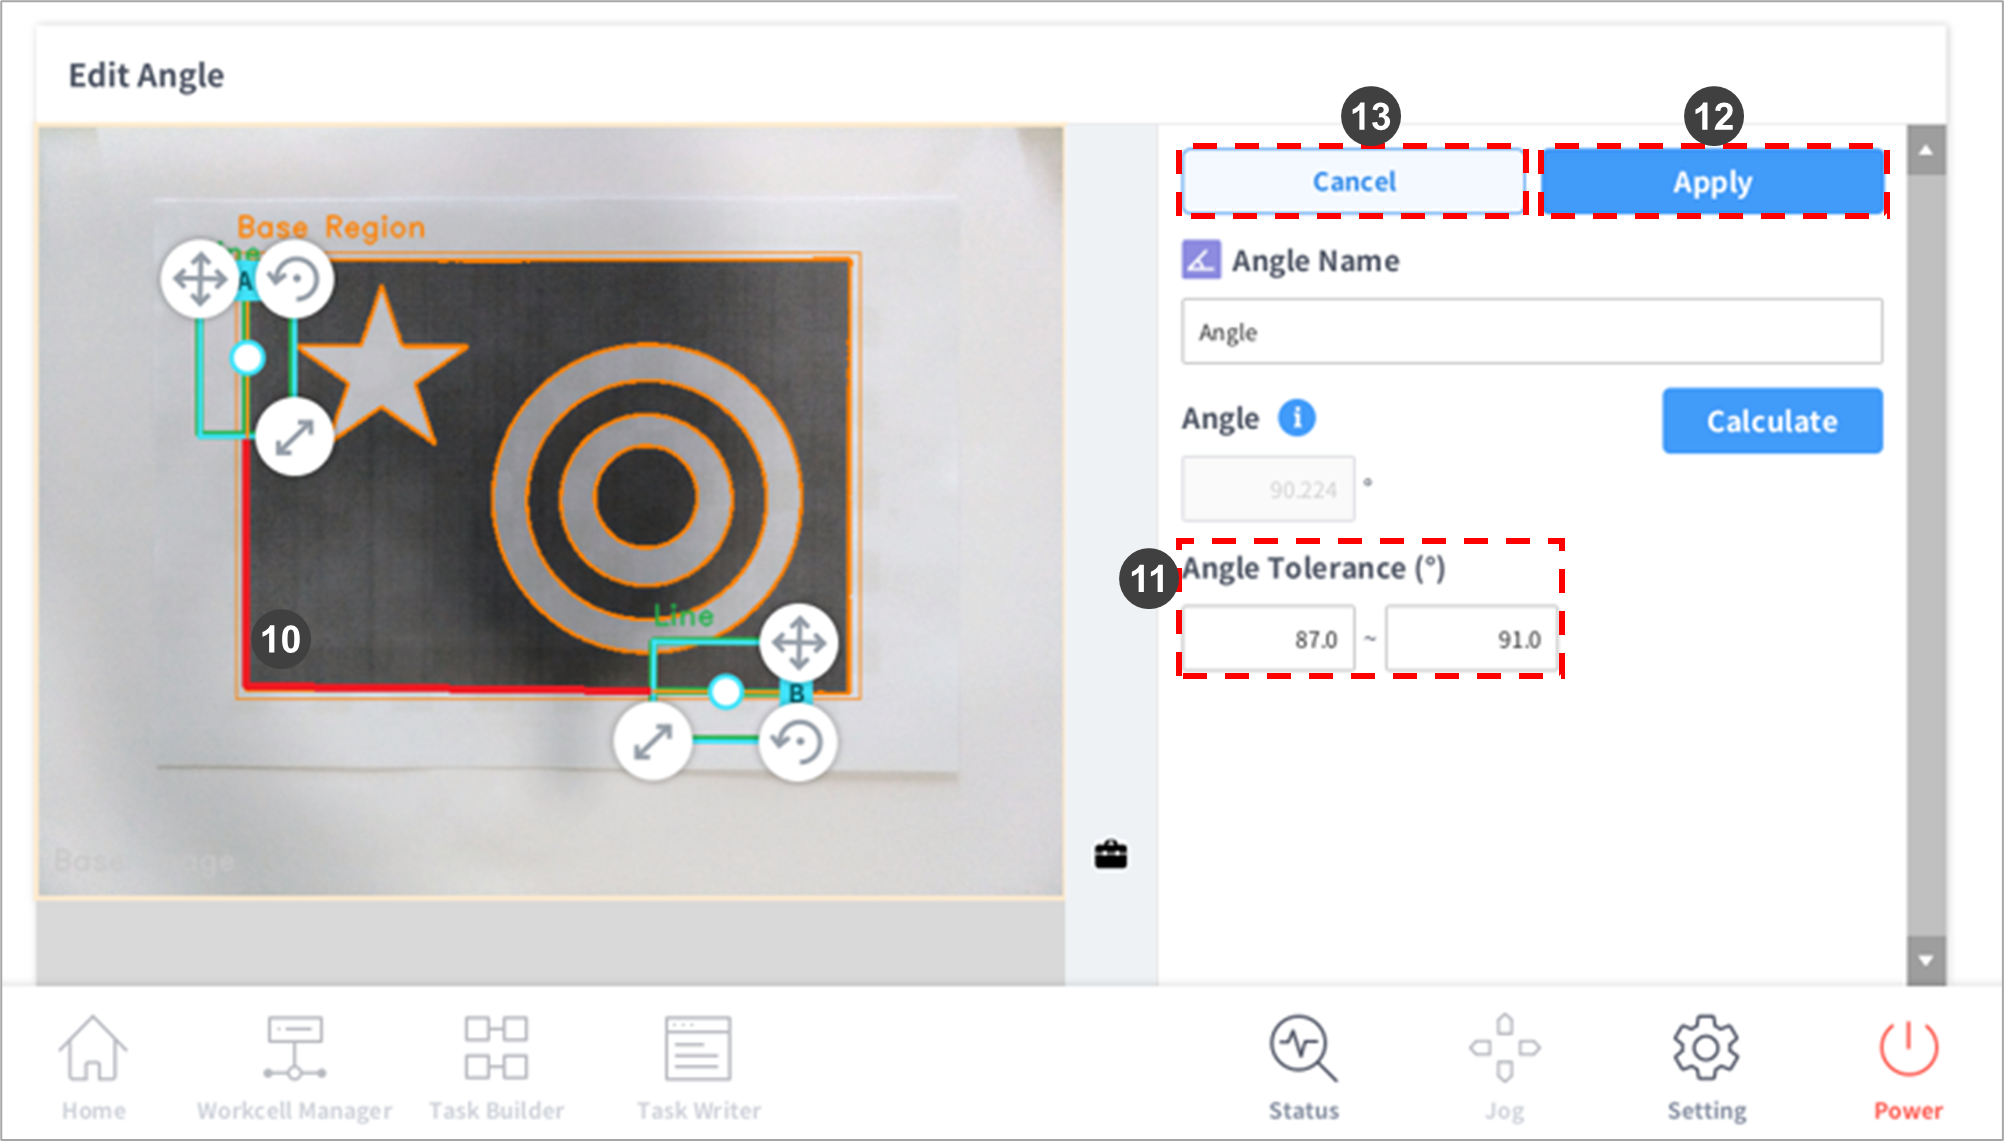
10 |
Angle Image Display |
Displays the angle between lines detected in two teaching areas on the image. |
|
11 |
Angle Tolerance Setting |
Configures the angle tolerance from the reference angle.
|
|
12 |
Apply |
Applies Vision Job settings. |
|
13 |
Cancel |
Cancels Vision Job Tool settings. |
The center of Line A and Line B refers to the detected line center rather the guideline of the teaching area box.