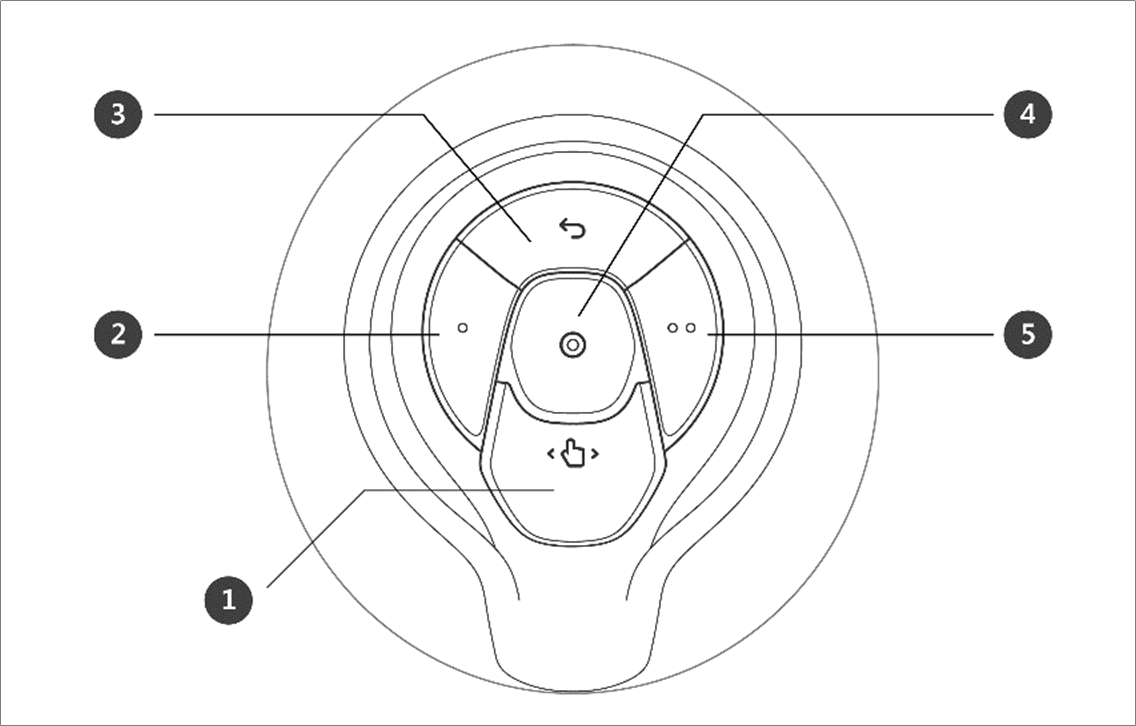
The user can change the robot’s pose while holding down the Hand-guiding button or custom button on the cockpit.
|
No. |
Item |
Description |
|---|---|---|
|
1 |
Hand-Guiding Button |
This button can be used to adjust or change the robot’s pose. |
|
2, 5 |
User Setting Button (Constrained Motion) |
This button can modify the robot’s pose by entering a pose according to a lock condition corresponding to a mode.

For more information about the settings, refer to Cockpit Setting. |
|
3 |
Cancel Button |
Deletes the most recently saved pose. |
|
4 |
Save Pose Button |
Saves the current robot pose. For more information, refer to Skill Command Work Point Setting with Cockpit Buttons. |
Caution
-
A Series models without FTS (A0509, A0912) cannot use User Setting Button(Constrained Motion).
-
The above five models can use six buttons and functions normally, but do not provide a Cockpit setting menu.
-
-
A Series models with FTS (A0509S, A0912S) are capable of using User Setting Button(Constrained Motion).
-
Fixed motion relies on the FTS attached to the tip of the robot; therefore, it is essential to attach the tool and for the robot to grip it as it moves. Moving the robot while holding the body may not trigger a reaction from the robot.
-
For details on the functional limits of each robot series, please refer to Functional Limits of each Robot Series.